
EnrollNow allows study teams to import participant data to update existing participant profiles or add new information to newly created Custom Variables. This can help teams efficiently update participant records in bulk without manually editing each participant profile.
Common examples include importing updated contact information, study-specific values, screening results, participant IDs, appointment information, or other data stored as a Custom Variables.
Before You Begin
If you are importing data into a new Custom Variable, create the Custom Variable first. Once the Custom Variable has been created, it will be added as a column in your import template.
You should also confirm that you have the appropriate permissions to import participant data and update participant records. Only Site Admins or Study Admins are able to complete imports.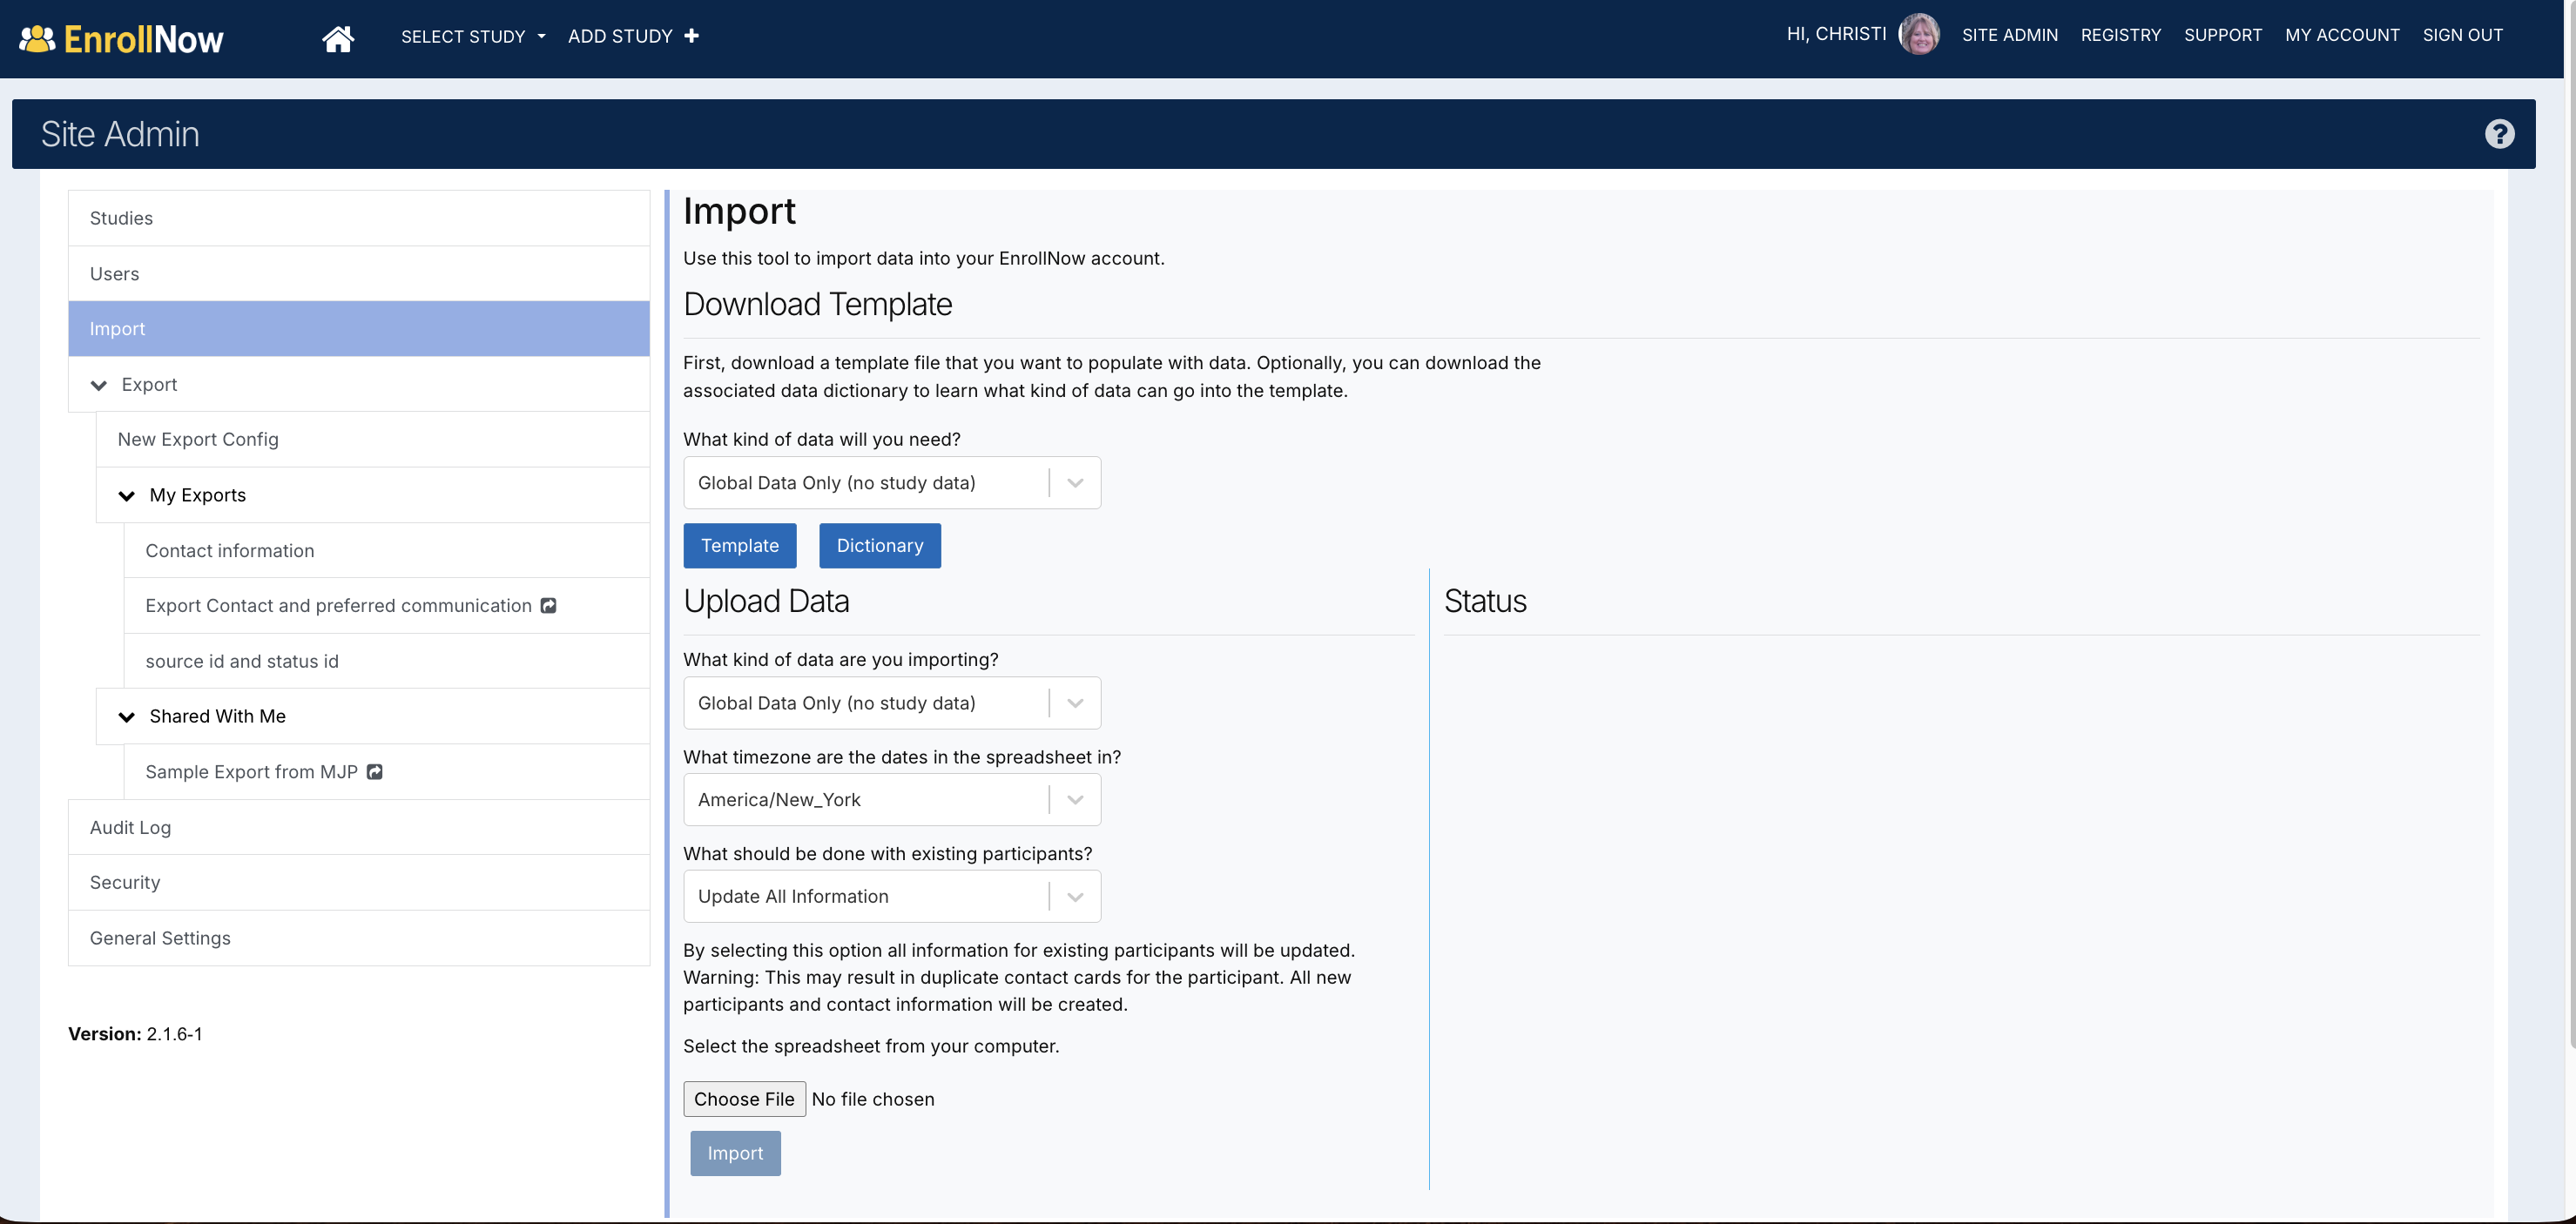
NOTE: It is recommended to complete a test import for a small group of participants before importing data for all participants. This allows you to confirm that the data imports correctly and that no unintended updates are made.
Step 1: Download and Prepare the Import Template
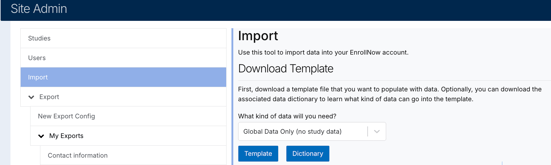
Click the Dropdown for What Kind of Data will you need and choose the study you want to import data into or leave as Global Data Only.
Download the import template from EnrollNow.
- IMPORT TYPE: The type of import will be identified on the Template spreadsheet as the last column. DO NOT DELETE THIS COLUMN.
-
Before entering your data, remove any columns that are not needed for your import. The template should only include the columns required to identify and match the participant, along with the columns for the data you want to update or add through the import.
Your spreadsheet should include enough identifying information for EnrollNow to match the imported data to the correct participant record to prevent duplicate participants from being created with the import.
Note: Additional identifiers, such as a Custom ID or Family ID, may also be included in the import file to support your workflow . However, these should be used along with the recommended participant identifiers to help EnrollNow match records accurately and prevent duplicate participant profiles from being created.
Recommended participant identifiers include:
- Global ID
- First Name
- Last Name
- Date of Birth
If Global ID is available, it is recommended to include it in the import file because it can help EnrollNow accurately match the imported data to the correct participant profile and prevent duplicate participants from being created.
NOTE: Refer to the Data Dictionary for the required format of each data field included in the import.
Step 2: Add the Data to the Custom Variable Column
Add the data for the Custom Variable you want to update or use to import new information.
The column header should match the Custom Variable field you are importing into. If the Custom Variable already exists in the study, the column will already be included in the import template.
Each row should include the value that should be added or updated for that participant.
Example:
| Global ID | First Name | Last Name | Date of Birth | Study Password |
|---|---|---|---|---|
| 12345 | Jane | Smith | 01/15/1980 | ABC123 |
| 67890 | John | Doe | 03/22/1975 | XYZ789 |
In this example, Study Password is the Custom Variable being updated.
NOTE: Leaving a field blank in an import will not clear or remove existing data from a participant profile. If you need to replace existing data, enter a clear placeholder value in the import file.
For example, if you need to replace a date value, you may choose a placeholder date far in the past, such as 01/01/1901. For a password or other text field, you may enter a placeholder such as XXXXX so your team has a visual cue that the information still needs to be updated or entered.
Step 3: Review the Data
Before importing, review the spreadsheet carefully.
Confirm that:
- Each participant has the correct identifying information.
- The Custom Variable column is included.
- The Custom Variable values are accurate.
- Dates are formatted consistently.
- Required fields are completed.
- There are no extra spaces, duplicate rows, or incorrect column headers.
Step 4: Open the Import Tool
Navigate back to Site Admin -->Import in EnrollNow.
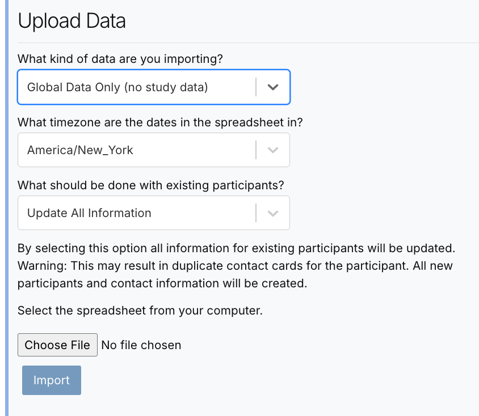
Choose "What kind of data are you importing?".
If Global information is being imported leave as Global Data Only. If you are importing for a particular study, use the drop down to choose the study name.
Choose "What should be done with existing participants? from the dropdown.Choices are:
- Update All Information
- By selecting this option all information for existing participants will be updated. Warning: This may result in duplicate contact cards for the participant. All new participants and contact information will be created.
-
Do Not update any Contact information
-
By selecting this option all information except contact information will be updated for participants found in your database. All new participants and contact information will be created.
-
-
Do Not update any existing participants
- By selecting this option nothing will be updated for participants already found in your database. All new participants and contact information will be created.
NOTE: For importing new custom variable data for existing participants, Choose "Do Not update any Contact Information"
Step 5: Choose File
Choose the excel spreadsheet you created with the study template.
Click Open. A validation of the import will run automatically.
Step 6: Validate the Import
Review any validation messages before completing the import.
If EnrollNow identifies errors, review the message, update the spreadsheet as needed, and re-upload the corrected file.
Common validation issues may include:
- Missing required participant identifiers
- Incorrect date formatting
- Column headers that do not match expected fields
- Invalid values for fields with predefined answer options
- Duplicate participant rows
- Custom Variable values that do not match the expected field type
Step 7: Complete the Import
Once the file has been uploaded and validated, complete the import.
EnrollNow will update the matching participant records with the Custom Variable values included in the spreadsheet.
Step 8: Review the Updated Participant Records
After the import is complete, review a few participant profiles to confirm the data imported as expected.
Open a participant profile included in the import and confirm that the Custom Variable value appears correctly.
Important Notes
Importing participant data can update existing participant profiles when EnrollNow is able to match the imported row to an existing participant.
If EnrollNow cannot match the row to an existing participant, the import may create a new participant record, depending on the import type and settings selected.
Always review your import file before completing the import to help prevent duplicate participant records or incorrect data updates.
If you are importing sensitive information, such as passwords or other confidential study data, consider whether the Custom Variable should be marked as blinded so only users with the appropriate permissions can view the information.
Best Practices
Use Global ID when available to help EnrollNow match imported data to the correct participant records.
Do not change the column headers in the import template. The template automatically populates the column header names to match the fields in EnrollNow.
Create any new Custom Variables before preparing the import file so the related columns are available in the template.
Before importing all participants, complete a small sample test to confirm the appropriate information is updated and that no unintended changes are made.
Save a copy of the original spreadsheet before making any changes.