
Study Statuses enable you to organize participants into custom groups as they move through the screening, enrollment, and event protocol stages of your study. These statuses serve as flexible categories to visually distinguish participants on the Study Dashboard, as well as the Potential and Enrolled Participant pages.
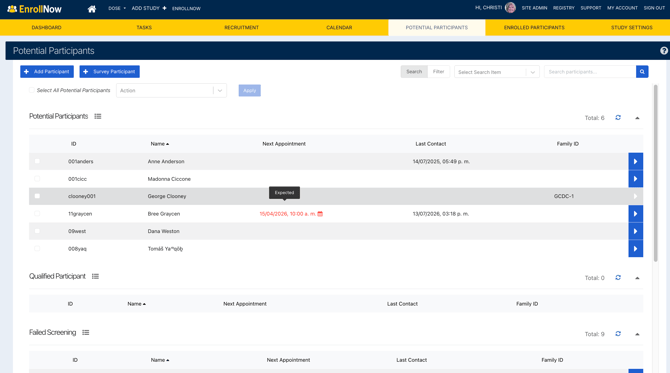
Creating and Editing Statuses
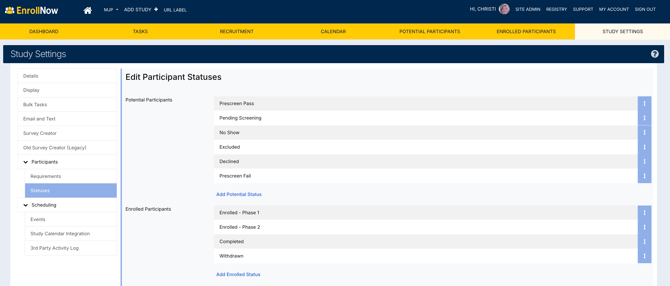
Customizing Statuses is crucial for effectively managing your study's workflow. To add or edit Statuses:
- Navigate to the Study Settings tab.
- Click on the Statuses section.
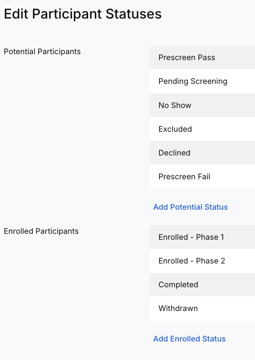
By default, a new study includes two Statuses: Potential Participants and Enrolled Participants. When creating a new Status, you can specify whether it will appear under the Potential Participants or Enrolled Participants tab.
Status Limit Recommendation
To ensure smooth performance, avoid adding more than 15 Statuses per page. This includes a maximum of 15 Statuses on the Potential Participants page and 15 on the Enrolled Participants page. Exceeding this limit may cause pages to load slowly.
Creating and Managing Statuses
To Create a New Status:
- Add a New Status:
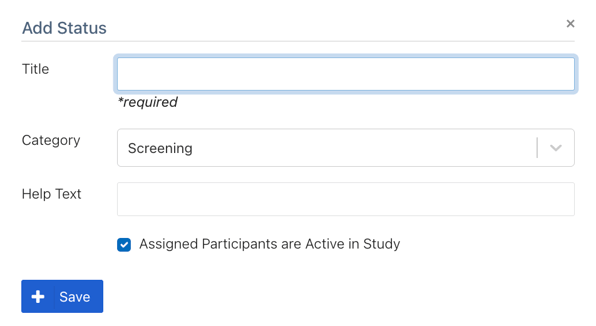
- Click the "Add Potential Status" or "Add Enrolled Status" button under the tab where the new Status will appear (either Potential Participants or Enrolled Participants).
- Name the Title of the status.
- Add Category for the status.
- Add Help Text to describe the purpose of the Status.
- This Help Text is viewable by hovering over the Status name on the Potential or Enrolled Dashboards.
- Click Save.
 To Edit or Delete a Status:
- Click on the Status to open the Edit Status window.
- Make changes or delete the selected Status.
Important: Remove all participants assigned to a Status before deleting it in the Study Settings.
To Reorder Statuses:
- Click the blue Reorder button (on the right).
- Drag and drop Statuses into the desired order for your study protocol.
Additional Resources
For additional guidance, refer to the following resources: