
Sending a Text Message to a Participant in EnrollNow
Users with the appropriate permissions can send text messages directly from a participant’s profile. Once sent, the message is recorded in the participant’s Text log for tracking and reference.
Before sending a message, confirm that the participant has provided any required consent to receive text communications and that the phone number listed on the profile is current.
Step 1: Open the Participant’s Profile
Navigate to the participant’s profile in the appropriate study or in the Registry.
Select the Text tab on the participant’s profile.
Step 2: Create a New Text Message
Click the green Add Text button.
A new text message window will open.
Step 3: Enter the Message Details
Review or enter the following information:
- The participant’s phone number
- The text message content
Confirm that the phone number is correct before sending the message.
Step 4: Select Optional Settings
Depending on your workflow, you may see the following options:
Contact
Select Contact to record the text message as the participant’s Date of Last Contact.
Pin Text
Select Pin Text to keep the message near the top of the participant’s Text communications page.
Global
Select Global to save the Text log entry as global Registry data. This allows the communication record to be viewed across the participant’s associated studies, based on user access.
Step 5: Send the Text Message
Review the recipient information and message content, and then send the text.
The message will be delivered to the participant and recorded in the participant’s Text log.

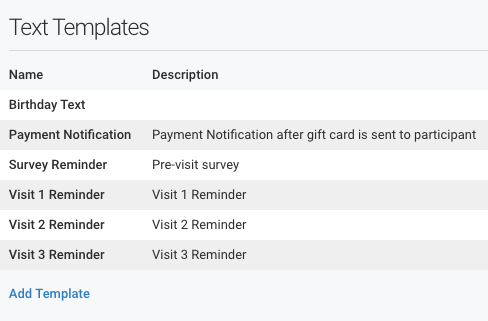
Using a Text Template
If Text Templates have been created for the study, you can select an available template instead of entering the full message manually.
Text Templates may contain supported merge fields that automatically populate information such as:
- Participant name
- Study name
- Upcoming appointment information
Always review the completed message before sending it to confirm that the personalized details are accurate.

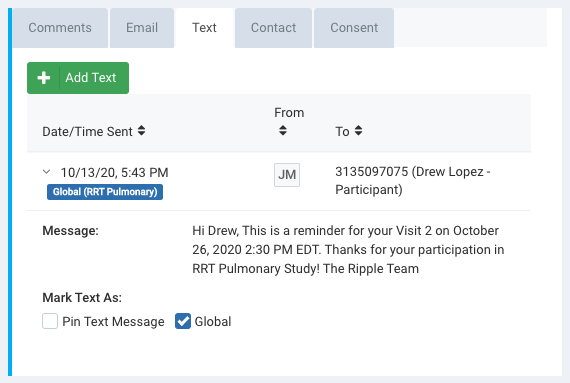
Viewing the Sent Message on the Text Log
After sending the message, return to the participant’s profile card Text tab to view the communication record.
The Text log may display:
- The date and time the message was sent
- The message content
- The recipient
- The user who sent the message
Automated Messaging allows teams to configure text messages that are sent automatically when specific conditions are met.
Automated texts may be triggered by:
- A scheduled study Event
- The completion of a study Event
- Participant or study data available in EnrollNow
- Other supported messaging triggers
To configure Automated Messaging:
- Navigate to Study Settings.
- Select the Email & Text section.
- Create or manage the appropriate automated message.
Automated text messages can help teams provide timely reminders and follow-up communication without requiring staff to send each message manually. For more details on setting up automated text messaging from EnrollNow refer to this article.
What Happens if the Participant Replies?
If a participant replies to a text sent from an EnrollNow phone number, they receive the site’s configured default response.
This automated reply does not create a two-way text conversation with study staff. Site Admins can customize the default response under General Settings in the Site Admin tab.
Best Practices
Before sending a text message:
- Confirm that the participant has consented to receive texts.
- Verify that the phone number is accurate.
- Keep the message clear and concise.
- Avoid including unnecessary sensitive information.
- Review all merge fields and appointment details.
- Use the Global option only when the communication should be available across the participant’s associated studies.