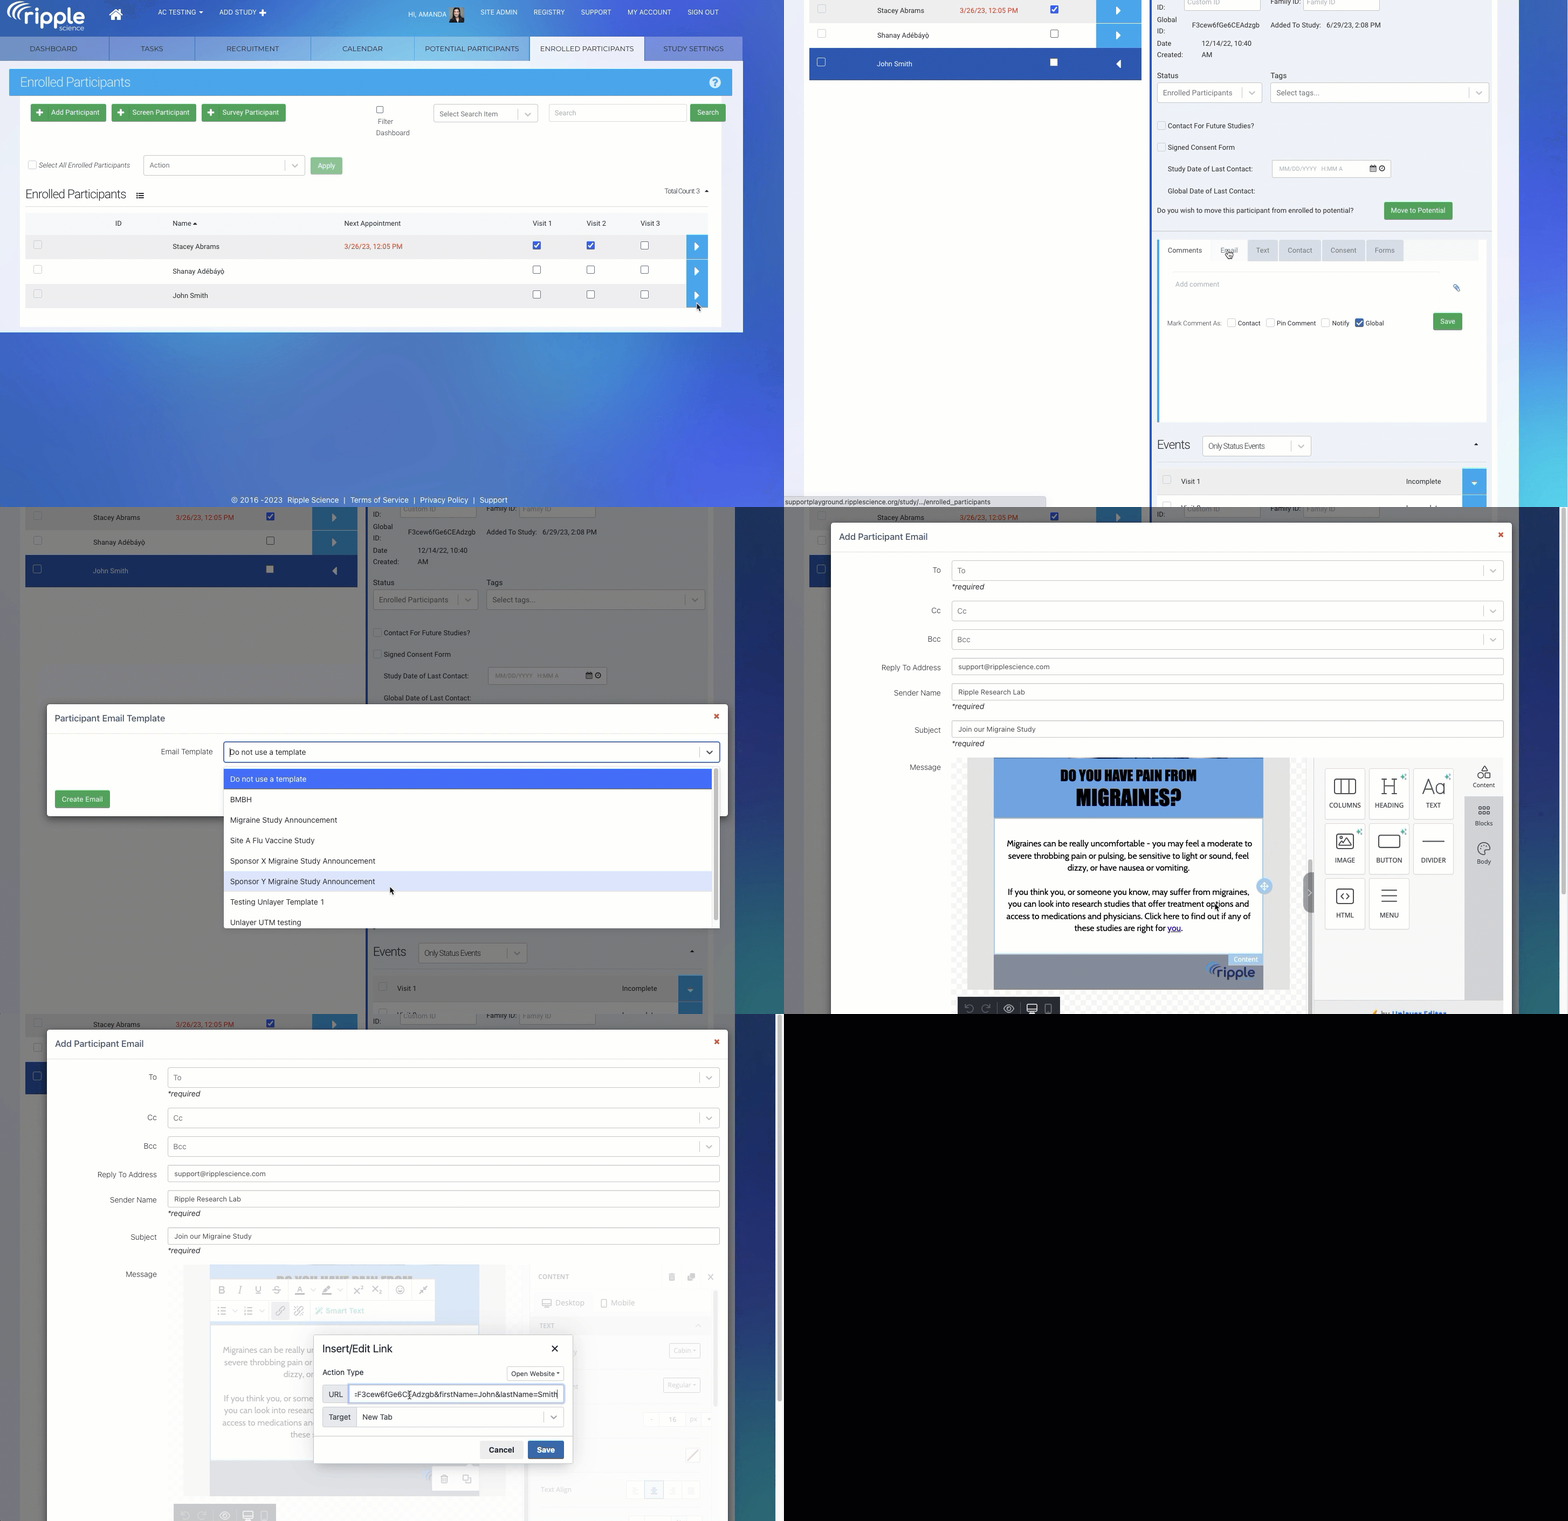
Surveys can be used to collect and update information on an existing participant’s profile card, such as contact information, eligibility details, or other data collected throughout a study. To help ensure that a survey submission is matched to the correct existing participant rather than creating a new participant profile, you can create a personalized survey link that includes identifying participant information.
This article explains how EnrollNow matches survey submissions to participant profiles and how to create a personalized survey link using participant variables.
How EnrollNow Matches Survey Submissions to Participants
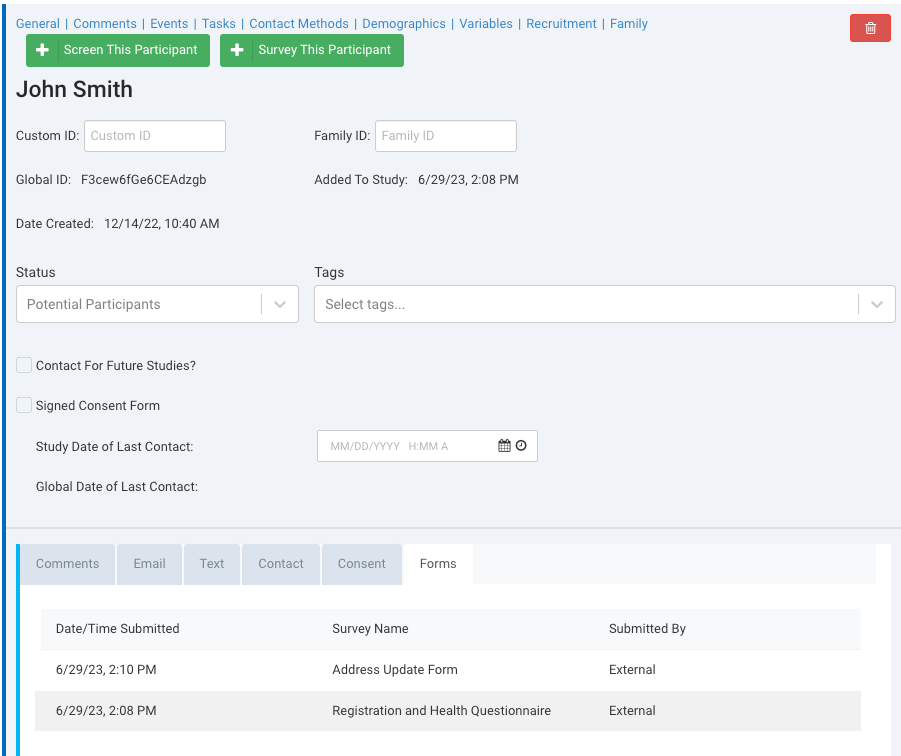
When a survey is submitted, EnrollNow uses specific identifiers to determine whether the submission should update an existing participant profile or create a new participant profile.
EnrollNow can match a survey submission to an existing participant using any of the following combinations:
- First Name + Last Name + Birthday
- All three values must match an existing participant.
- First Name + Last Name + Global ID
- All three values must match an existing participant.
- Global ID
- A matching Global ID alone is sufficient to associate the survey submission with an existing participant.
Important Matching Considerations
First and Last Name
- First Name and Last Name are spelling-sensitive but are not case-sensitive.
- If capitalization differs between the participant's existing profile and the survey submission, the participant's name may be updated to reflect the capitalization used in the most recent submission.
Global ID
The Global ID is a unique participant identifier and provides the most reliable method for matching a survey submission to an existing participant profile.
Best Practices
- Use consistent spelling and formatting when collecting participant information.
- When possible, include the participant's Global ID in personalized survey links.
- Consider making participant name fields Read Only when they are pre-filled to prevent participants from accidentally changing the information.
- Use buttons or images for clickable elements instead of plain text to make the email more visually engaging.
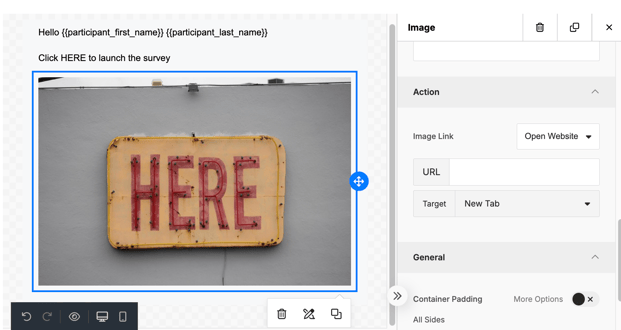
- To personalize links in buttons or images, use the Action Section in the element’s properties.
- To personalize links in buttons or images, use the Action Section in the element’s properties.
Creating a Personalized Survey Link
You can personalize a survey link by adding participant information to the survey URL. This allows EnrollNow to pre-fill identifying information, such as the participant's Global ID, First Name, and Last Name, when they open the survey.
Personalized links can be especially useful when surveys are sent to existing participants through EnrollNow email templates.
Important: Unsupported Characters
A survey may not be able to pre-fill participant information correctly if the participant's First Name, Last Name, or Global ID contains certain special characters.
These include:
- Spaces
-
Apostrophes (')
- Quotation marks (
") - Commas (
,) - Periods (
.) - Question marks (
?) - Plus signs (
+)
Step 1: Add Participant Variables to the Survey
You must have Site Admin or Study Admin permissions to modify surveys.
- Go to Study Settings > Survey Creator.
- Create or open the survey you want to personalize.
- Add the participant information you want to pre-fill.
First Name and Last Nam
If your survey includes First Name and Last Name, make sure the field names remain exactly as created by EnrollNow:
- First Name:
firstName - Last Name:
lastName
These field names are case-sensitive.
TIP:
First Name and Last Name are not required when Global ID is included. However, displaying the participant's name can help reassure them that the survey was intended for them. Consider enabling Read Only for these fields so participants cannot accidentally change their names.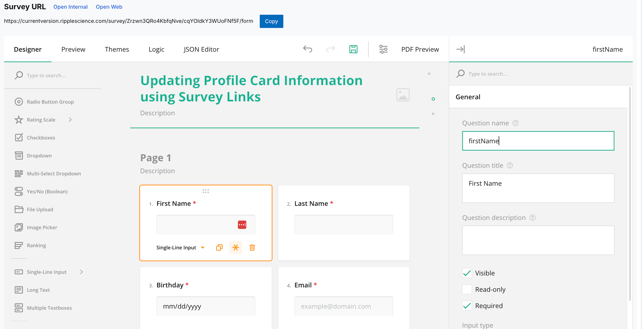
Add a Global ID Field
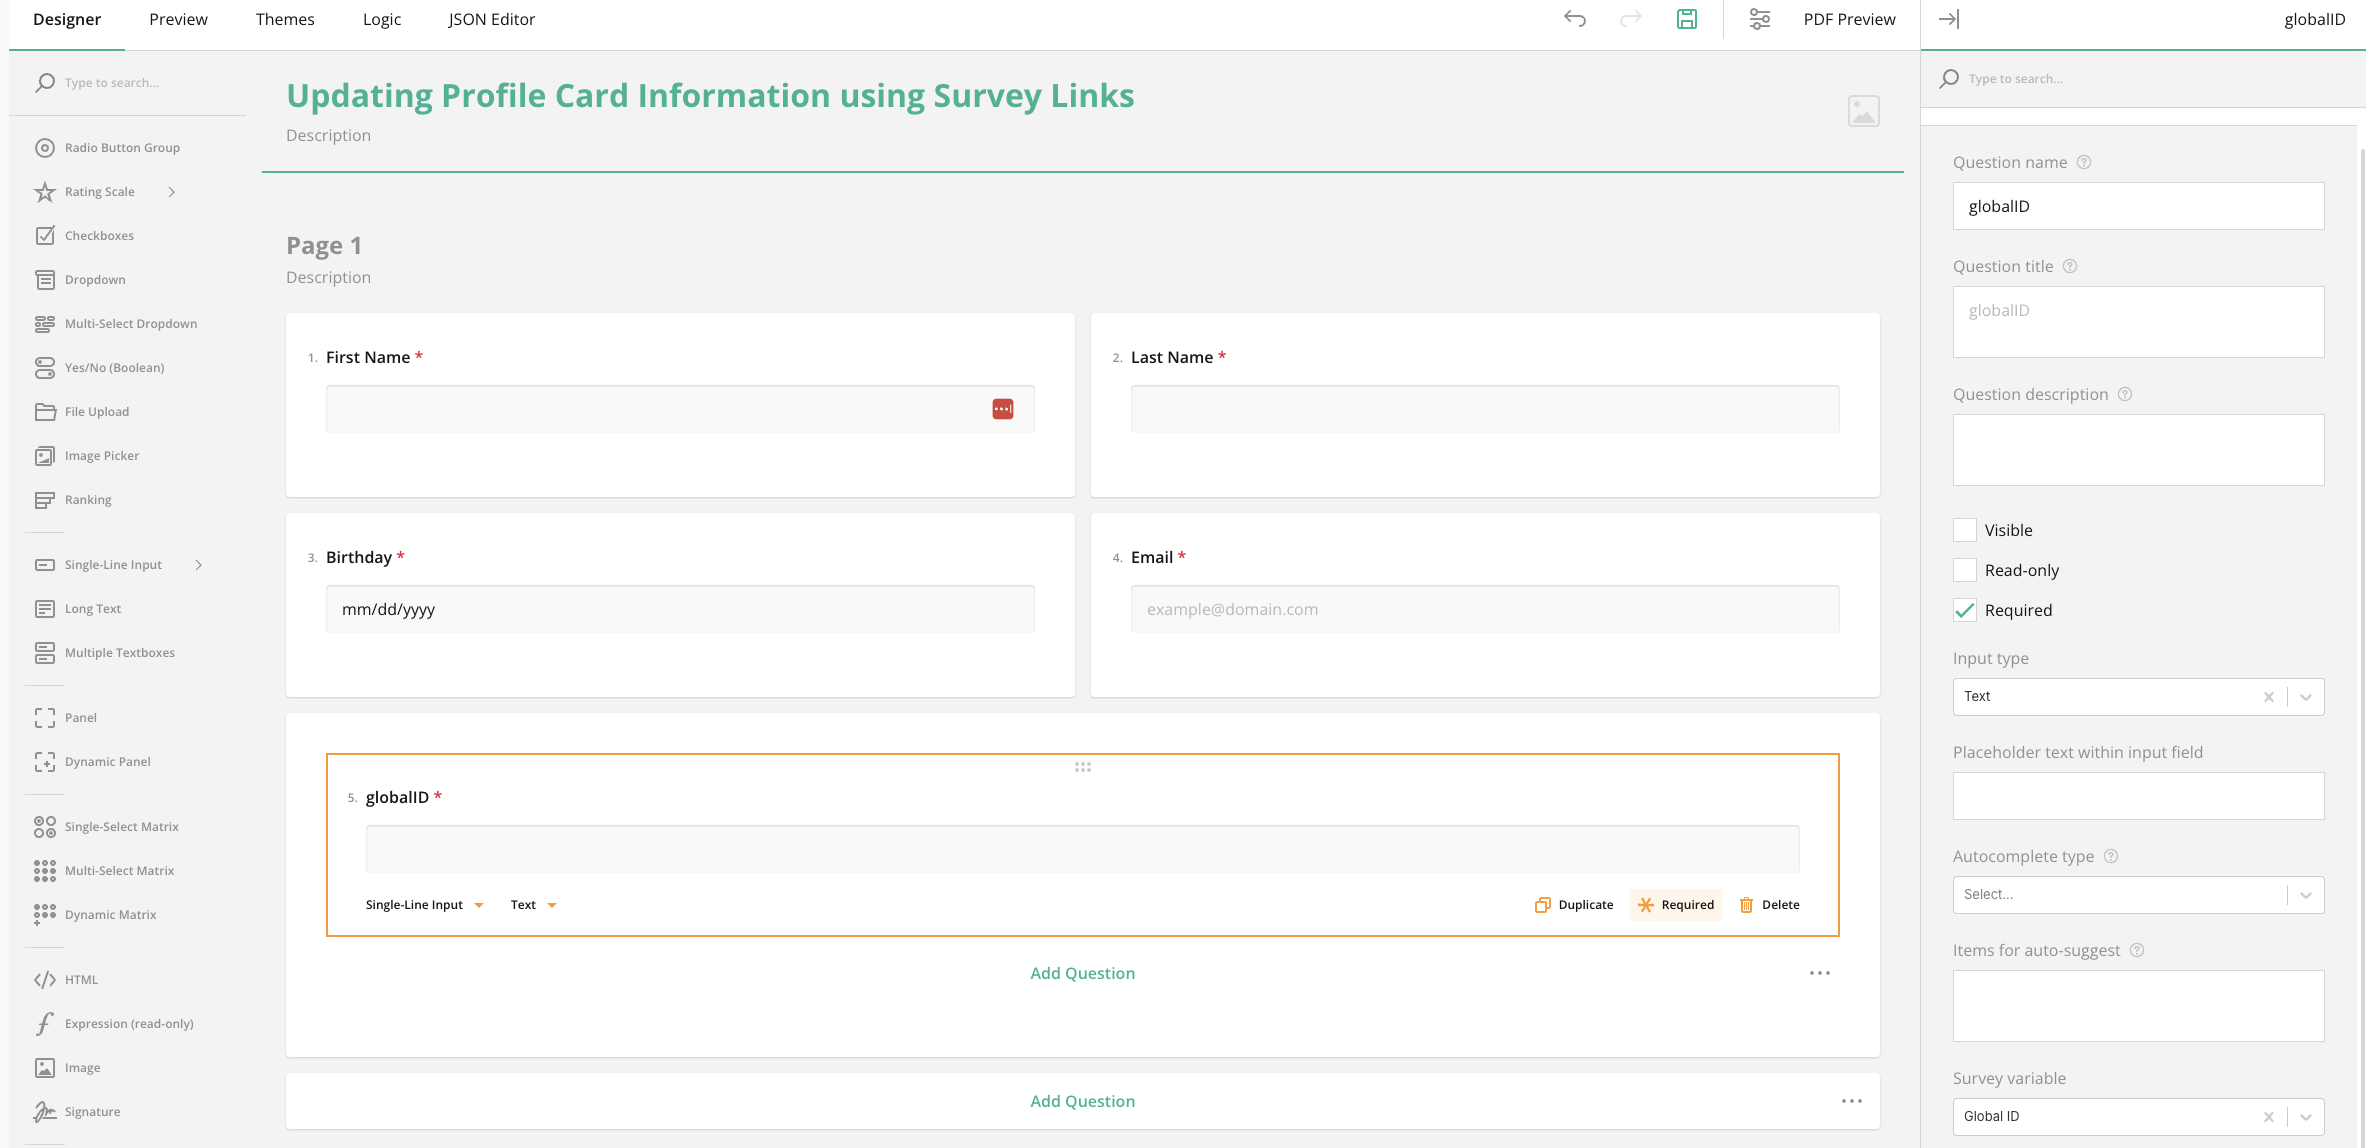
- Add a Single Input question to the survey.
- Open the question's Properties.
- Enter the following as the field name:
globalId
The field name is case-sensitive.
- Uncheck the box for Visible so the Global ID is not displayed to the participant.
- In the Survey Variable section, scroll down and choose:
Global Id
- Save the survey.
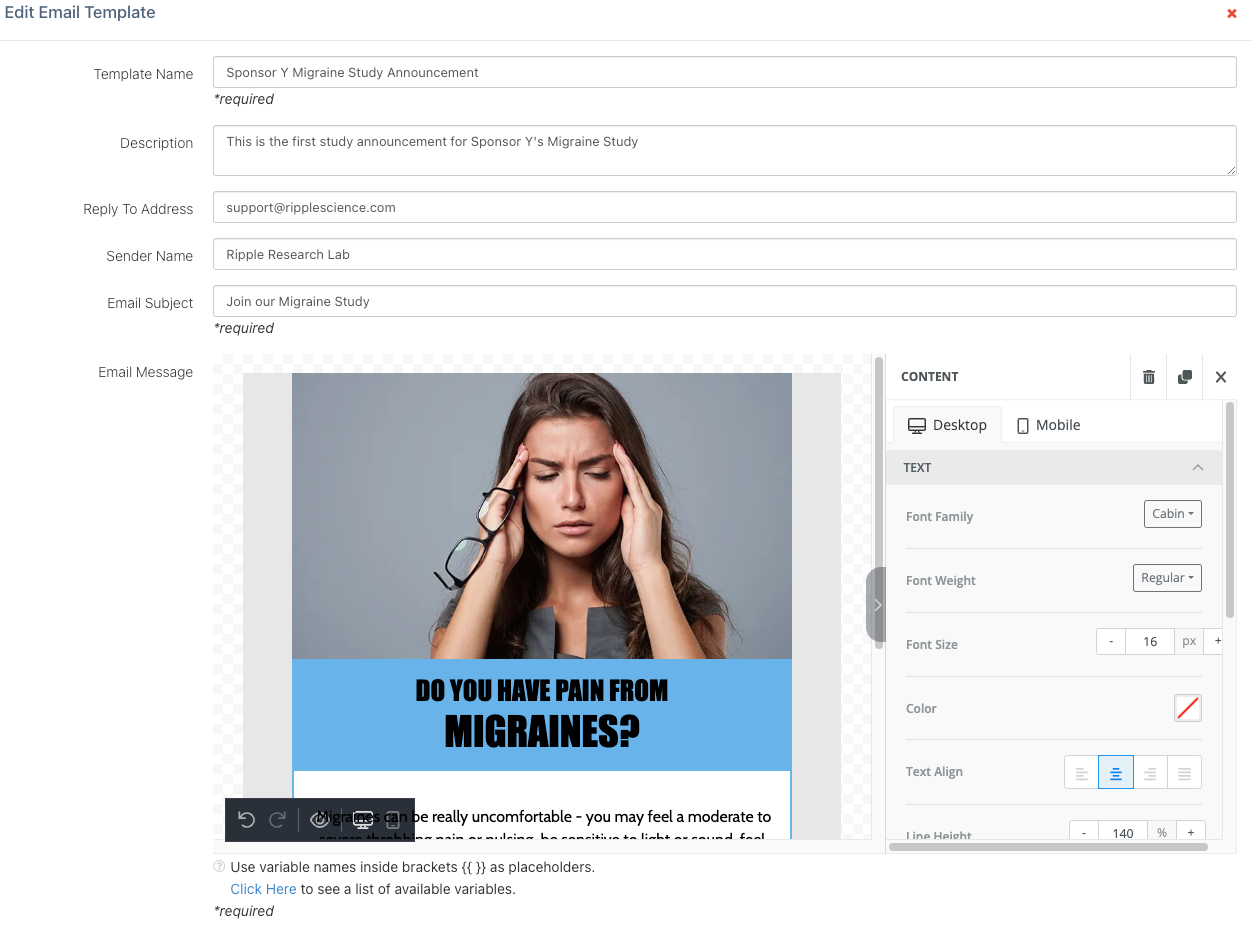
Step 2: Create an Email Template
- Go to Study Settings > Email and Text.
- Create a new email template or open an existing template.
- Add the element participants will select to open the survey.
- Text
- A button
- A header
- An image
Step 3: Add the Personalized Survey Link
Add the survey URL to the element participants will select in the email which is found at the top of the survey in Survey Creator.

For text or other supported elements:
- Select the text or element where you want to add the survey link.
- Select the Link icon.
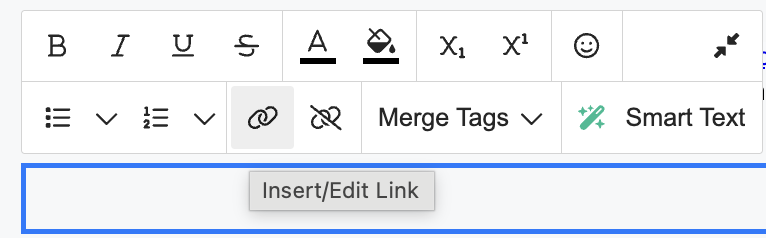
- Paste the survey URL into the URL field.
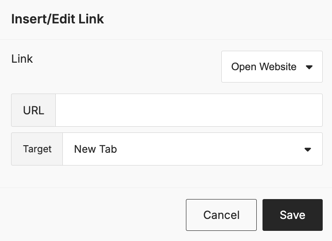
- Add the participant parameters to the end of the survey URL.
Use:
?globalId=&firstName=&lastName=
For example:
https://your-surveyurl.com?globalId=&firstName=&lastName=
URL should look similar to this:
https://currentversion.ripplescience.com/survey/Zrzwn3QRo4KbfqNve/cqYOldkY3WUoFNf5F/form?globalId=&firstName=&lastName=
-
- Choose whether the survey should open in the same tab or a new tab.
- Save the email template.
When EnrollNow sends the email to a participant, the participant merge fields in the URL are replaced with that participant's information.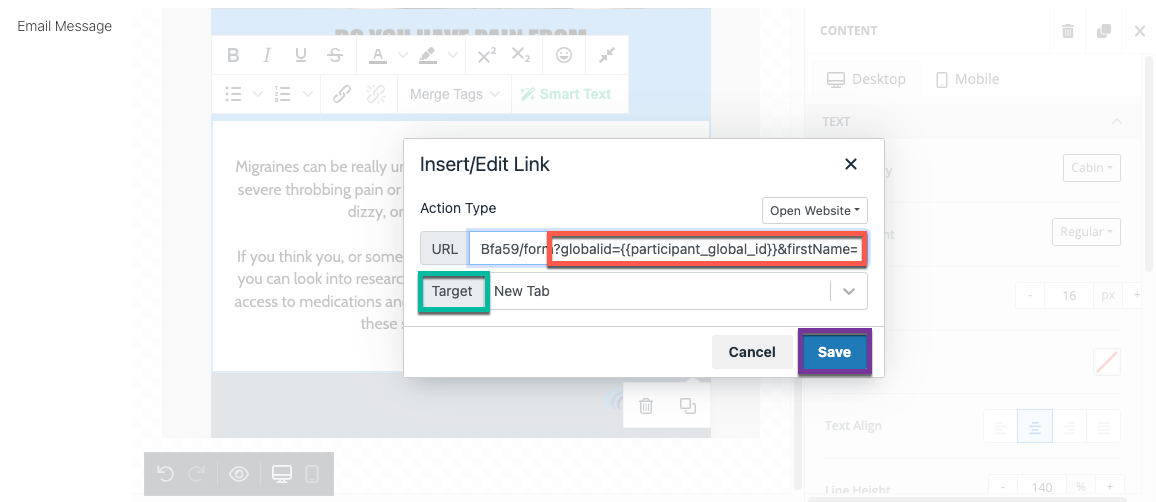
Using a Button or Image
You can also make a button or image open the personalized survey instead of displaying the survey URL as text.
When using these elements, add the personalized survey URL through the element's Action settings.
Step 4: Test the Personalized Survey Link
Always test the personalized link before using the email template with participants.
- Open a test participant's Profile Card.
- Go to the Email Log.
- Select Add Email.
- Choose the email template containing the personalized survey link.
- Send the email.
- Open the email and select the survey link.
- Confirm that the expected participant information is pre-filled in the survey.
Verify that:
- The correct Global ID is associated with the survey.
- The correct First Name is displayed, if included.
- The correct Last Name is displayed, if included.
Once testing is complete, the email template can be used to send personalized survey links to participants.
Additional Tips
- Use Global ID whenever possible. Because Global ID uniquely identifies the participant, it provides the most reliable method for matching a survey submission to an existing profile.
- Make pre-filled name fields Read Only. This can help prevent participants from accidentally modifying identifying information.
- Test before sending. Send the personalized survey to a test participant first to confirm that the URL and participant variables are working as expected.
- Use buttons or images. A button or image can provide a cleaner and more participant-friendly way to direct participants to the survey.